“Corona WordPress Theme” Documentation by “Kriesi” v1.0
“Corona WordPress Theme”
Created: 09/09/2011
By: Christian "Kriesi" Budschedl
Email: Kriesi
Informations about Updates and New Themes are always announced on Twitter and Facebook. Twitter updates are usually more up to date, Facebook updates are more detailed and easier to follow :)


Hello! First of all I would like to thank you for purchasing my theme! :)
If you have any questions that are beyond the scope of this help file, please feel free to ask your question at the support forum at http://www.kriesi.at/support/.
This file will teach you how to set up and use the “Corona” WordPress Theme.
This file is really extensive so you might think the theme is hard to use,
actually its not, you probably just might jump to the options page and explore everything yourself, this file is more of a reference work if you do not know what to do, or if you are not familiar to WordPress.
Have fun with your new theme! best regards
Kriesi
Table of Contents
- Folder Structure
- Installation
- Setting up the Theme Options
- Setting up Styling
- Setting up layout & settings
- Setting up your Footer
- Setting up the general Portfolio options
- Setting up the Contact form and Social Network Informations
- Setting up the Sidebar
- Setting up the Menus and Mega Menus on your site
- Using custom Widgets
- Adding Blog, Page and Portfolio (how to create entries and use preview images)
- The power of shortcodes
- Building your own dynamic Templates
- HTML Structure
- CSS Files and Structure
- JavaScript
- PSD Files
- Image Sizes
- Sources and Credits
A) Folder Structure of Corona and the Avia Framework - top
The Theme is built with WordPress best practices in mind, therefore it makes heavy use of the WordPress template engine. What exactly does that mean?
Whenever you see a php function call like this within your php files (get_template_part(), get_header(), get_footer() or get_sidebar() ) the theme retrieves a reusable code snippet, most of the time a chunk of code that is used in many different files.
- This approach has the benefit that you can edit a single code snippet and the changes will effect many page templates
- Its still easy to only change a single page template since you can simply include a modified copy of the snippet instead of the original one
- Last but not least it makes the folder structure clear and tidy
Folder structure:
- Corona → all PHP template files needed to run the WordPress theme as well as the main stylesheet (style.css)
- JS → Custom Javascript files, the prettyPhoto Lightbox clone and the jQuery library
- CSS → Multiple stylesheets for color variations, an empty custom.css file that should be used to add your changes and a shortcode.css file
- Images
- Layout Images, Icons folder etc
- Framework → The theme is built on top of my very own "Avia Framework". All framework files are located in this folder. Modification of the framework is not recommended
- Includes → Lots of small code snippets and functions that were mentioned before that make the theme flexible and easy to edit
- admin →mostly configuration files for the admin panel. also holds some registration functions for custom post types and dynamic styles
- Slideshow: the files necessary for the PieceMaker 3D Slideshow
A1) Before you start
You might want to check out these 7 short screencast that show some of the basic functionality of the theme:
These 7 Videos Contain:
- Installation and using the auto importer
- Setting up the home and blog page and assigning a default layout
- Setting up a page, changing the layout and adding a slideshow with images and video
- Using shortcodes with the visual shortcode editor to enhance your post layout
-
Building improved layouts with the template builder
- Setting up the menu with the help of your menu manager
-
Setting up a portfolio overview page and switching between layout options
B) Installation - top
You can either choose to upload the theme to your server via ftp (only upload the unzipped folder „Corona“ into the folder wp-content/themes/ ) or via WordPress upload function. to use the upload function of the WordPress admin panel make sure to ONLY upload the “Corona” folder and not the whole archive file that you received by themeforest. Here is a short demo video on how its done
Notice: if you are new to WordPress and have problems installing it you might want to check out this link: Solving broken theme issues
After that is done activate the theme as you would activate any other theme at Appearance->Themes.
Corona is now the active theme and you will be sent to the Themes Option Panel immediately.
If you are new to WordPress and have problems with setting up the theme you might want to import the dummy content file that comes with the theme. You can import this file by clicking the "Import dummy data" Button of the Corona Theme options. The theme will then import some dummy posts and pages from the live preview. However you will still need to set some options on your own, like which page should serve as front page or how menus should be displayed. A quick demonstration video can be found here. (its really more a demonstration than a tutorial but it might be helpfull nevertheless. the video was recorded using the Brigtbox Theme but the options are the same for Corona since the themes share a framework)
B 1) Setting up the Theme Options - top
If you want to change the general Options of the Theme open the “Corona” Theme Options Panel (located in your admin sidebar) and click it, you will notice several tabs with options, which we will discuss now one by one.
 Front page & Blog page
First of all you have to choose which content your front page should contain. You can either choose to display a page of your choice, or if you dont select a page the blog will be displayed. If you choose to select a page you can then pick another page that will display your blog instead of the default page content. If you want to make the front page look like the one in the theme demo make sure you select a page and then create a unqiue dynamic page template.
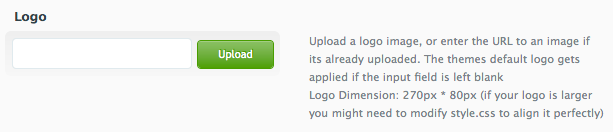 Logo
Logo
Next you can choose to upload your own logo. Make sure that the logo has the correct dimensions. If you need to embed a logo of different size you might need to edit the CSS files directly. We will talk about CSS best practices for the theme in a second after we talked about the last input field on the Theme Options page:
 Google Analytics Tracking Code
Enter your Google analytics tracking Code here. It will automatically be added to the themes footer so google can track your visitors behaviour.
B 2) Setting up Styling - top
 Theme Colors:
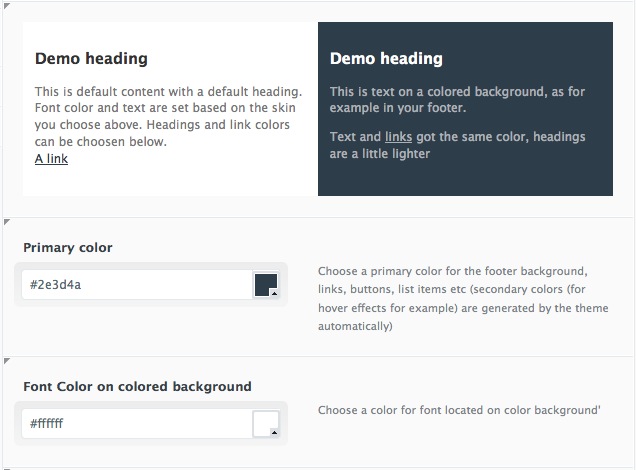
With only two different color inputs you can easily create new layouts in seconds. You just need to select a primary color for your links and as background color for footer and some other elements, as well as a font color for text placed on those elements.
As you can see the theme generates the color scheme on the fly: In this example we have choosen a dark blue background and white text on that blue background. The white gets applied to the heading and for the text the theme generates a slightly "darker" by adding a little of the blue background.
Heading Fonts
You can choose several fonts that will add a unique feeling to your site. The fonts you can choose are a selection of some of the google free web font archive and applied via cufon, so that windows and mac browsers will display them the same way.
Quick CSS
If you want to do minor changes to the css you can enter them here and they will be added to the css. If you want to do major changes we recommend you to use the custom.css file.
B 3) Setting up Layout & settings top
 Stretched or boxed layout
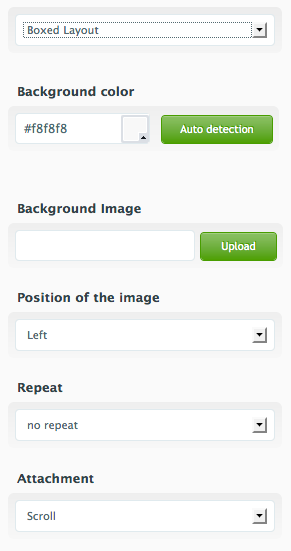
The stretched layout expands from the left side of the viewport to the right. The boxed layout will create a box around your content area that is approx. 1000px wide. if you select boxed you will get additional options for background color and image.
Default Blog Layout: The layout you choose here will be applied as the default blgo layout. This means thtat by default all blog overview pages, blod entries and archives will use this style. You can overwrite this setting for each post entry individually. When using the template manager you can also create seperate blogs that use another layout.
Default page Layout: The layout you choose here will be applied as the default for all pages. You can overwrite this setting for each page entry individually. When using the template manager you can also create pages that differ from any of those layouts.
Page Sidebar navigation: By default the theme creates a sidebar navigation if you are currently viewing a page that has any childs or siblings nested. You can deactivate those sidebars here if you dont want them displayed. If you choose to display them you can chane the order of the page items by changing their "page order" in the page edit screen.
B 3) Setting up your footer top
To set up your footer you need to select how many columns it should be displayed. Once that is done head over to the themes widget page (appearance-> widgets) and add widgets to the footer widget areas displayed here. The default widgets that are displayed in your footer will be removed once you apply any other widgets :)
B 4) Setting up the general Portfolio options- top
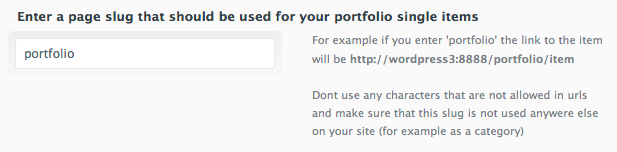 The first task when setting up your portfolio is to set the URI scheme for your portfolio single entries. The default is set to "portfolio" so for example if you create a new portfolio entry that should show your latest artwork WordPress will display the url as Http://yourDomain.com/portfolio/latest-artwork.
It is quite important to understand that you need to take care that the slug entered here does not interfere with other category slugs, otherwise WordPress will not be able to find your portfolio entries and simply display a 404 page. Sounds probably a little complicated but as a rule of thumb, if you just make sure that you got no post-category or page with the same name as the slug set here, no problems should occur.
 Creating a portfolio page
Creating
a portfolio page requires several steps. First of all you need to create a few single entries that contain whatever you want to show to the world :) This is easily done by clicking the "Portfolio Items" link in your admin sidebar and start creating new entries just as you would create new blog posts. Add Images, add categories and if you are done return to the Corona->Portfolio settings.
Now you need to set the two most important options:
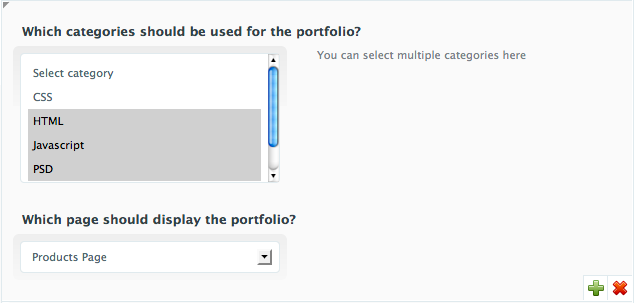
First of all which portfolio posts do you want to show on your portfolio page? SImply select the categories that hold the posts in the select box.
Then we need a page to display those items. Select this page from the dropdown menu and you are done. If you no save the options and head over to this page it should act as an overview page for your portfolio. The default page content wil be shown in the small sidebar beside your portfolio entries.
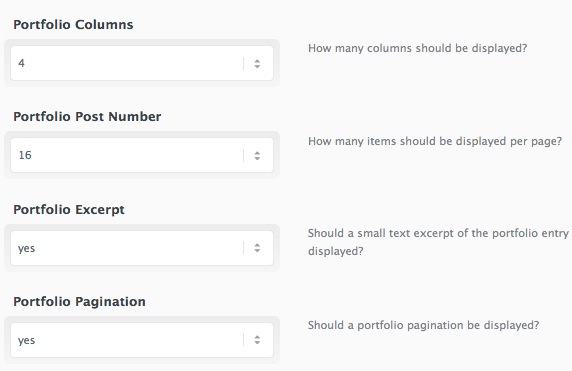 Once that is done choose which kind of portfolio you want to display:
You can select 1, colum, 2,3 and 4 column porfolios, as well of some variations with sidebars. You can also select how many portfolio entries to display on your portfolio page and if you want to show the portfolio excpert and the pagination
Not visible in this screen is the sorting option which also can be hidden.
By clicking the [+] and [-] icons at the bottom right of the page you can create an unlimited amount of portfolio pages that contain different workpieces, based on the categories you select.
B 5) Setting up the Contact form and Social Network Informations - top
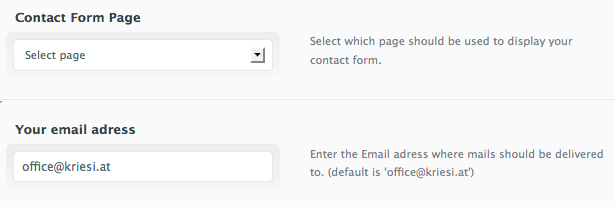 Setting up contact form and social information is a rather quick task: just select the page that should display the contact form and also select the email address that should receive the mails.
If you add your twitter account name or the link to your Facebook page or profile a social icon will be displayed at the top of your page and at the footer for either of them. As for your worpdress feed: if you dont add anything to the url the default RSS feed will be applied automatically. If you got a feedburner RSS adress you can also enter it here. For example: http://feeds.feedburner.com/kriesi
B 6) Setting up the Sidebar - top
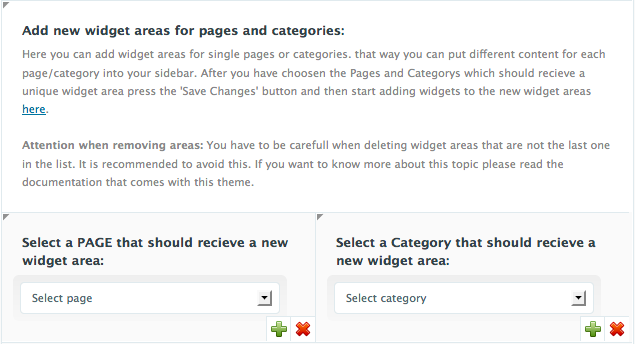
 Next step is to select those categories and pages that should get a unique set of sidebars. For every category or page choosen here the theme will add a new Sidebar Widget area at appearance/widgets. Once you have choosen the pages and categories press save and head over to the widget section of WordPress.
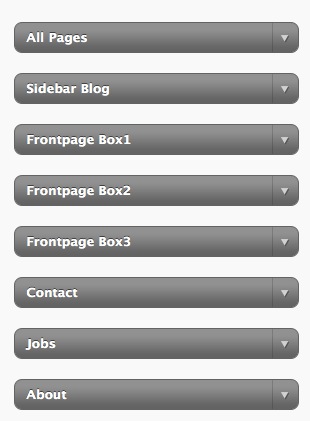
You will see that the new areas just got appended to the predefined ones.
So adding these areas is easy.
However be very careful when removing widget areas that already got widgets applied to them.
WordPress doesn't remember where it stores widgets by name, it stores this information by number. So if I would add a text widget to Contact (widgetarea Nr6 in the screenshot), and then delete the Contact widget area, the widgets would then be in Jobs. (previously in 7, now the new 6)
B 7) Setting up the Menus on your site - top
The Theme improves the WordPress 3.0 menu items with a few additional options that make it possible to create subheadings for the main menu items. To do this just enter some text into the menus description field. If you have problems pulling that off: here is a short demonstration on how its done
The theme offers 2 menu locations: the Main menu location beside your logo and a very small submenu location at the top of your page, right above your logo. Once you have created a menu you then have to select where to display it. Please keep in mind that the small menu location above your logo doesnt support dropdown menus or mega menus.
You can also create additional menus and display them within your sidebar by adding the menu widget to one of your sidebars
B 8) Using custom Widgets - top
The Theme comes with several custom widgets that let you display latest blog posts, latest portfolio entries or your latest tweets either in your sidebar or if used in conjunction with shortcodes also within your content area. It also has a combo widget with 4 tabs taht includes latest comments, latest entries, most popular entries and post tags, as well as an advertising widget, and a social media count widget.
The options are pretty much self explaining, the widgets are named "Corona Latest News", "Corona Latest Portfolio" and "Corona Twitter Widget"
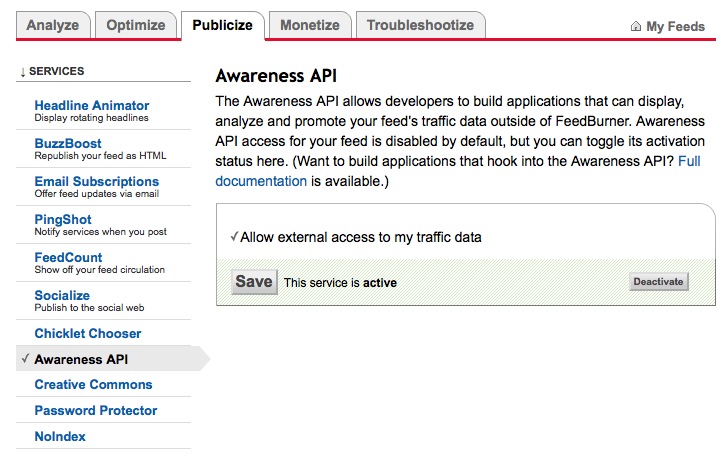 The only widget which might need a little bit of explanation is the social media count widget: it displays the number of twitter follower as well as the number of your rss feed subscribers in the sidebar. The feed subscribers can only be shown if you enter a valid feedburner feed url (this will not work with your default wordpress feed url) Also make sure that the awarness API of your feedburner account is active, otherwise your wordpress installation will not be able to access your feed data.
B 9) Adding Content (how to create gallery entry and preview images) - - top
 Writing a post, page or portfolio entry doesn't really differ from doing so when using other themes. You add a title, add some content, and categories and thats about it. In Corona you need to do a few more things:
If you want to create a blog entry, page or portfolio entry you got the possibility to add either a single featured image or multiple images that get converted to a slideshow. If you have never worked with a slidehsow of one of my latest themes this short demo video might be interesting for you.
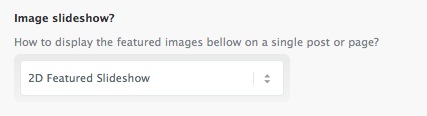
When writing the post, scroll down; bellow the text-area you will notice a few extra fields: First you can choose which slideshow type you want to use and if autorotation for this post should be active. Once that is done you can add one or multiple Images and also set diffferent settings for each slide depending on which slideshow you have choosen (eg 3D Slideshows have the option to set a different transition for each slide )
First of all just click the upload button and add upload your image to your web-server. Click the "Use image as Feature Image" button and a thumbnail will be inserted. You then can add a caption title and a caption text if you want to. When uploading a picture all different thumbnail sizes needed for the theme are generated by WordPress. However this only happens if you add new pictures. if you are using pictures that were already uploaded before the Corona theme was activated, WordPress cannot resize them. 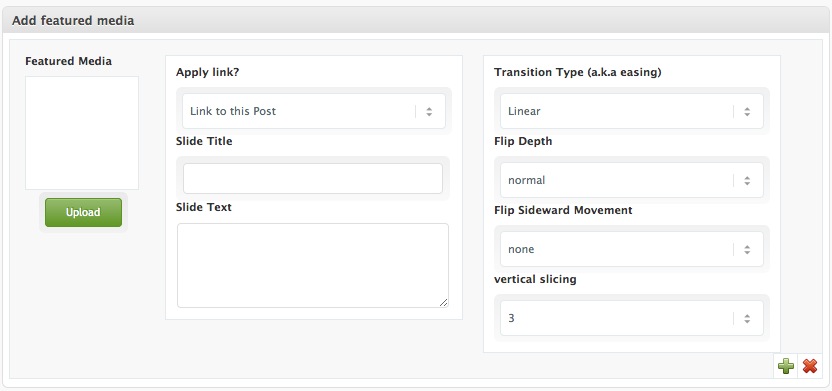
Next you can add a caption or caption title if the slideshow you have choosen supports this. When using a 3D slideshow like in this image you also have the option to set the transition type for each image.
- Transition Types: defines the easing of the slide. Easing defines how fast or slow an image starts to change
- Flip Depth: How deep into the background should the element move while flipping
- Flip Sideward Movement: how much to the left should the blocks move when rotating
- Vertical slicing: Vertical slices of the image
Proabbly the best way to understand these settings is to set 3 or 4 images and then fool arround with the settings until you know what each one does :)
Clicking the small plus and minus icons at the right bottom of the page will let you add new feature images or remove old ones.
If the user doesnt have flash enabled and you have choosen to display a 3D slideshow a 2D jQuery version will be displayed instead.
Using Video:
When working with the image slider you can also choose to display video content instead of images. this works very similar.
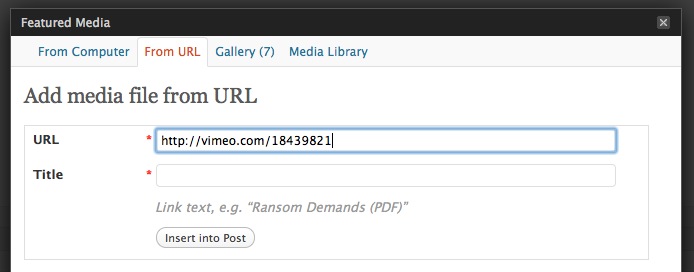 If you want to displaya video from vimeo, youtube or another video service that is supported by wordpress oembed, just click the upload button, but instead of uploading choose the "from URL" tab and enter the url of the video in there. Once you hit "insert" the slideshows preview picture will change and display a film reel.
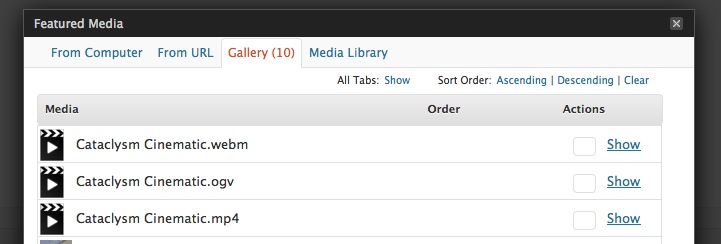 If you want to display self hosted videos: that works as well, but only for HTML 5 compatible data types. The slideshow will automatically embed the movies as HTML5 movies with a fallback flash slider. Supported formats are .mp4, .webm and .ogv. This media types can either be uploaded like images or you can enter the adress as seen above. If you want to upload different formats for different browsers (some browsers support mp4, some ogv, some webm) feel free to do so by just linking to one of these files and uploading the others with the same name but different file format. The Slideshow will automatically check if the browser used to display the video is capable of displaying the content as HTML5 video, and if thats not the case serve a flash fallback. It is recommended to always at least provide a h264 encoded mp4 file. If you want to set a "poster image" (a image that is displayed before the player starts) simply upload an image with the same name as the video. Please be aware that wordpress cant detect your video size automatically, therefore you need to upload the image in the correct size if it should be displayed properly and without distortions :)
Please note that the 3D slideshows also supports video and using the option is similar to using a html 5 image. The big difference is that when using a html 5 image you can opt to upload a poster image, when using the 3d slider the poster image is mandatory or the slider will break. So upload a video file (for example test.swf) and also a JPG file with the same name (test.jpg) at the same time, then insert then select the video and click the "use as featured" button to insert it as featured media.
B 10) Using shortcodes - top
What is a shortcode and how do i use it?
Shortcodes are small text snippets that get converted by WordPress. As an example:
Using shortcodes is very easy. To use one, create a new post (or edit an existing one), and in the the editor type a shortcode in brackets, such as:
[quote]This is a pull-quote.[/quote]
to generate a pull-quote. Other example would be the use of shortcodes to create columns within your post:
[one_half first]Content here.[/one_half] [one_half]Content here.[/one_half]
[one_third first]Content here.[/one_third] [one_third]Content here.[/one_third] [one_third]Content here.[/one_third]
[one_fourth first]Content[/one_fourth] [one_fourth]Content[/one_fourth] [one_fourth]Content[/one_fourth] [one_fourth]Content[/one_fourth]
[one_fourth first]Content here.[/one_fourth] [three_fourth]Content here.[/three_fourth]
[one_third first]Content here.[/one_third] [two_third]Content here.[/two_third]
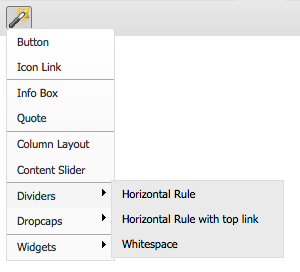 The theme comes with quite a few shortcodes that are easily accessible thanks to a visual self-explanatory user interface that is accessible by clicking the magic wand button when you write a post
Most shortcodes require you to enter additional information and then get generated by the theme on its own, starting from columns to content slider. You can also choose to nest various shortcodes. For example create 3 columns, and within each of them display a small slideshow. Or do it the other way round: create a single slideshow that slides multiple columns. The sky is the limit :)
Attention: Please make sure to always start new shortcodes on new lines. Most of the time you wont encounter any errors if you don't do that but unfortunately WordPress does mess up the html sometimes. This is true for all shortcodes but the inline ones like drop-caps buttons and icon links, those are the only ones that don't need a new paragraph.
In case you encounter odd behavior always make sure that all shortcodes are closed as expected. Also when trying to nest shortcodes please be aware that you cant wrap a shortcode with the same name around another one with that name: For example: [one_third first] [one_third first]Content here.[/one_third] [/one_third] would result in messed up html code since WordPress is not able to identify which opening tag belongs to which close tag. However what you can do is nest shortcodes within each other if they don't share a name. for example you could easily place a slideshow within a 3rd column tag. Just make sure to add new paragraphs between them ;)
Icon Box shortcodes: The theme comes with iconbox shortocdes (see at the bottom of this page). The Icons used are from the iconset "Iconsweets2" which has a lot more icons then we used. if you want to add some of them, or any other just upload your icons to the image/icons/iconbox/ folder. Once that is done, they will appear in the dropdown box of the visual shortcode generator if you create a new iconbox
B 11) Building your own dynamic Templates - top
Probably the best way to create stunning and complex pages is the Wordpress Template Builder that comes with the theme. Allthough you can of course choose to edit template files the old fashioned way, (by editing them in your HTML editor of choice) the dynamic template generator is a much more flexible solution. So how does that editor work? Before reading the how to you might want to check this short demo video which already describes a little how it is done.
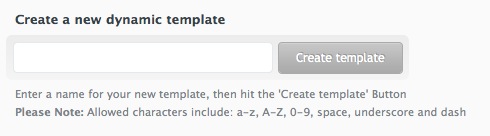 First of all open the editor at Corona-> Template Builder. You then get asked to enter a name for your new dynamic template. Do so by entering one without any special characters and at least 3 chars long. Hit the "Create Template" button and a blank default template is created.
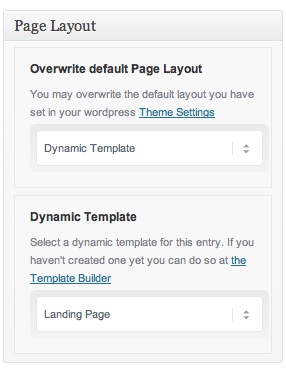 It doesnt contain any elements yet but we will add some in a second, first lets apply the template to a post, page or portfolio entry of your choice. Simply open the entry you want the template to be applied to and look out for the "Page or Post Layout" Sidebar. Here you need to overwrite the default layout with the option "dynamic template" Then can now select the template you have just created.
Once selected save the entry. If you look at it in the frontend now it should simply display a blank content area.
To change that we need to start elements to the dynamic template. So head back to the new Dynamic Template you just created and start adding elements. Once an element is added you can easily change the position via drag and drop. To make it as easy as possible we tried to reduce the elements available to the absolute necessary minmum. We ended up with7 "modules":
Horizontal Ruler
adds a horizontal ruler to the page to seperate content. Choose between several styles to fit your needs
Simple Text area
adds text to your page. This module is most often used to create a nice looking quote but you can also jsut fill in any html or even shortcodes to displaywhatever content you want. It is also used to create a callout section with buttons
Slideshow
adds the slideshow of the entry the template gets applied to. This way if you apply the template to different posts and pages it will still display the featured images of each individual entry. Uses the slideshow settings defined in the post or page.
Post/Page Content
This module behaves similar to the slidehsow: it will by default output the content of the entry the template got applied to. You can also choose to display a different post or page. If you choose to display a different post or page the content of that entry will be displayed instead. If the entry you have choosen is cut by the wordpress "read more" tag the module will output only the part before the read more tag and add a read more button.
Blog
adds a blog with sidebar to the template. You can choose which categories should be displayed, as well as how many entries and if a pagination should be displayed as well.
Portfolio
adds a portfolio to your page. You got the same options as in your portfolio section, only with the advantage that you can combine this portfolio with other modules to create unique portfolio pages.
Columns
adds one row with either 2,3 or 4Columns to the Page. You can choose the width for each column as well as the content. The available options are:
Page: add page content of a single page
Post: add the latest post from a category.
if you choose the same category a second, third, fourth or fifth time in another column the offset will be generated automatically so that you dont display the same post twice
Widget: Enter the name of a widget. the widget can then be used at appearance > widgets. Please be carefull when deleting widgets since the contents of a widget is stored by widget number and not by name. You can read more about it here.
Text:Add some text. html and wordpress shortcodes are allowed.
Attention: Since the Template Manager makes heavy use of Javascript it is recommended to use a modern browser, like IE9+, Firefox4+, Safari or Chrome. It will still work with older browsers but you will notice dropping performance if you add many templates.
C) HTML Structure - top
The Theme uses valid HTML 5 and comes with predefined classes for common elements needed in web design.
All templates share basic elements like header, footer, main, and entry so be carefull when editing those or adding/changing the CSS for those ids and classes :)
D) CSS Files and Structure - top
The CSS for the theme is split into various files: one that holds the basic markup for layout which is called style.css. We then got one file for the light and the dark sin in your css folder, as well as a shortcode css file. Last but not least we got an empty custom.css file which should be used by you to add your own modifications. Since we never touch the custom.css file when making updates you can easily update to later theme versions without beeing in danger of loosing stylesheet modifications.
E) JavaScript - top
The theme uses advanced jQuery functions. You do not need to know how to use jQuery to activate them, almost everything is controlled by WordPress. All the function calls as well as as the custom created jQuery plugins like the slideshows are located in the avia.js file.
Lightbox: a custom pretty photo skin
the lightbox gets automatically applied to links that contain images, youtube videos, vimeo videos, mov files and swf files. if you don't want to activate the lightbox on any of those links add the class 'noLightbox'. if you manually want to apply the lightbox to a link you can add the rel='lightbox' attribute to the <a> tag.
Better documentation can be found here:
http://www.no-margin-for-errors.com/projects/prettyPhoto-jquery-lightbox-clone/
F) PSD Files - top
Among with the theme come all psd files needed to edit the different skins. With these psds you can even create your own unique Corona skin.
F) Image Sizes- top
This is the image array used in functions.php to tell wordpress which image sizes to use. The preview images for dynamic templates at the bottom can be delted if you dont want to use dynamic template files of that size. that will save some performance while uploading and also some webspace on your server.
$avia_config['imgSize']['widget'] = array('width'=>36, 'height'=>36 ); // small preview pics eg sidebar news
$avia_config['imgSize']['related'] = array('width'=>130, 'height'=>130); // small images for related items (also for small blog overview images)
$avia_config['imgSize']['portfolio4'] = array('width'=>210, 'height'=>160); // small preview pic for default portfolio (4 columns )
$avia_config['imgSize']['portfolio3'] = array('width'=>290, 'height'=>200); // medium preview pic for 3 column portfolio
$avia_config['imgSize']['portfolio3_sb']= array('width'=>183, 'height'=>160); // medium preview pic for 3 column portfolio with sidebar
$avia_config['imgSize']['portfolio2'] = array('width'=>450, 'height'=>300); // medium preview pic for 2 column portfolio and small 3d slider
$avia_config['imgSize']['page'] = array('width'=>610, 'height'=>255); // image for pages and one column portfolio
$avia_config['imgSize']['blog'] = array('width'=>450, 'height'=>255); // image for blog posts (big)
$avia_config['imgSize']['featured'] = array('width'=>930, 'height'=>370); // big images for fullsize pages and fullsize 2D & 3D slider
$avia_config['imgSize']['fullsize'] = array('width'=>930, 'height'=>523); // big images for single portfolio pages
$avia_config['imgSize']['aviacordion'] = array('width'=>610, 'height'=>370); // big Image for aviacordion
/*preview images for special column sizes of the dynamic template. you can remove those if you dont use them, it will save performance while uploading images and will also save ftp storage*/
$avia_config['imgSize']['grid6'] = array('width'=>450, 'height'=>160); // half sized images when using 4 columns
$avia_config['imgSize']['grid8'] = array('width'=>610, 'height'=>200); // two/third image
$avia_config['imgSize']['grid9'] = array('width'=>690, 'height'=>160); // three/fourth image
///////
you can change these settings in functions.php. the theme will then create different thumbnail sizes according to your changes on upload. You might need to reflect those changes within your CSS file, depending on what you have changed ;)
G) Sources and Credits - top
- lightbox plugin
- Portions of Iconsweets2 Icon set
- Portions of Iconset Discovery
- Portions of Web Injection Icon Set
- flickr creative commons library pictures by: codyR, kretyen, mescon, obskura, freya23, amir K, Tambako the Jaguar, jaeWalk
- Images by creattica & psdtuts+: All images are copyrighted to their respective owners and not available for download with this theme.
Once again, thank you so much for purchasing this theme. As I said at the beginning, I'd be glad to help you if you have any questions relating to this theme. No guarantees, but I'll do my best to assist. If you have a more general question relating to the themes on ThemeForest, you might consider visiting the forums and asking your question in the "Item Discussion" section.
Kriesi